Pages

Showing posts with label canned food. Show all posts

Tuesday, February 26, 2013

Bento No. 11 - Burrito Casserole


I absolutely love Mexican food, especially burritos. It started with the Kenan and Kel show way back in the 90's. Kenan (or probably Kel) ate this humongous burrito and they got sick to their stomachs. I was so curious! The fast forward to the early two-thousands, I see Ron Stoppable ALWAYS eating at their local taco joint! It's official! I must try eating a burrito! And when I did! BAM! It was love at first taste! Now I can eat two Taco Bell burritos in one go, no problem!

I'm sure some of you experience this annoying (yet gratifying) moments in your life; you're craving for burritos and you want them now! You want them later, you want them for tomorrow! Heck! you'll eat it the whole week. We all have those moments, right?

This bento is inspired from this kind of moment. I can't count the number of times I made this just to satiate my extreme craving for burritos!


Carrot and cucumber daisy tutorial coming soon!


No Fuss Burrito Caserole

An easy to cook burrito casserole that is bursting with flavors

Ingredients

1 Can Chilli Con Carne / Chilli Beans
1 - 2 bulbs of red onions (depends on how spicy you want it), diced
Cooked Rice / Fried Rice / Flavored Rice
Strips of cooked beef (optional)
Grated quick-melt cheese

Directions

1. Pre-heat oven to 150C
2. In a casserole dish, layer the chilli, rice, beef, onions and cheese. Make sure that the topmost layer is cheese (and lots of it), and below it is either beans or rice.
3. Pop the casserole in the oven for 10 minutes or until all the cheese melts

Monday, February 11, 2013

Bento No. 10 - Cold Soba Noodles with Herbed Tuna and Tamago-Nori-Yaki


As I make more bentos, I guess, I become more creative in pairing my food. I also want to experiment more and try making Japanese food that I haven't tasted yet. I also tend to experiment on different container size and shapes to make my bentos more appealing. Today's Bento Menu:
  1. Cold Soba Noodles
  2. Herbed Tuna
  3. Tamagoyaki with Nori

Cold Soba Noodles Recipe

For this recipe, you can check out this post where I have the procedure for making Cold Soba, and listed all the ingredients and where to buy them.

Herbed Tuna

This herbed tuna recipe can be done in under 5 minutes!

1 Can Tuna Chunks

Your choice of herbs. Mine was Thyme

  1. Open the can of tuna and drain
  2. Combine your herbs and rub gently on the tuna
  3. To thoroughly infuse the flavor, microwave on low for 1 minute

Tamagoyaki with Nori

This is actually the most challenging to prepare. If it's the first time you're making this, it will take some patience. Actually, I don't have patience for this, that's why I asked my Kitty to do it for me! He's so great with it! For this, you'll need the following:

2 Eggs

1 Tbsp Sweet Soy Sauce

1 tsp Shallot Sauce (optional)

2 Nori strips
  1. In a bowl, beat together eggs, sweet soy sauce and shallot sauce. If you want striations or streaks on your tamagoyaki, just beat it enough to break the yolks
  2. Heat your tamagoyaki pan in low heat. Make sure to grease the pan
  3. Pour a bit of the mixture, just enough to cover the pan and form a thin layer of egg. Let the egg cook for a bit, and while the top is still a bit wet (but cooked),gently roll the egg layer
  4. Grease the part of the pan without the egg roll and then pour another layer of egg mixture. While it is cooking, place the nori strips on top of egg layer
  5. Gently roll the eggs again. You can add another layer of egg or leave it at that
  6. let the tamagoyaki oool and then slice

Thursday, August 30, 2012

Bento No. 9 Tuna on Wholewheat Rotini Pasta


This bento is easy to make, not to mention scrumptiously healthy! You can make this in under 30 minutes, and what's more, everything you need is in your cupboard!

Tuna on Wholewheat Rotini Pasta Recipe

Ingredients:

  • Half a box of Wholewheat Rotini Pasta (you may use other pasta, not necessarily wholewheat)
  • 2-3 cloves of garlic, pounded
  • A can of flaked tuna, drained
  • 1 small onion, diced
  • 2 tomatoes, diced

Procedure:

  1. Cook the pasta according to package instructions
  2. Oil a heated pan. You may use the oil in the canned tuna if you use the flakes in oil version. I used olive oil. Do take note that the oil will be the base of your pasta sauce, so make sure you use enough oil, and that the oil is a healthy oil. Once the oil is hot enough, saute garlic until lightly browned
  3. Add the tuna flakes. Sautee until the tuna is well heated
  4. Add in the onion and tomatoes. Sautee until well heated, and then simmer for a few minutes
  5. Mix the pasta sauce and pasta
  6. Pack in your bento box. Make sure that it is cooled before you refrigerate

    Friday, August 3, 2012

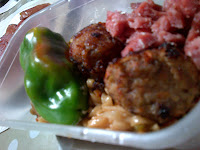
    Bento Day 2 - Pork Meatballs and Luncheon Meat on Spicy Chicken Yakisoba with Cheese-stuffed Green Bell Pepper

    This post is originally from my personal-anything-goes-blog, dated May 9, 2012
     

    Okay. So I had a hard time in planning out this bento, mainly because of budget constraints, and also because I had a different bento in mind yesterday afternoon, and I found out later that I lack most of the ingredients needed for the bento I wanted to make for today. I guess that bento'll be for another day.

    Anyway, my bento today took me, more or less, 45 minutes to make. It's a really long time to make a bento this simple, but hey, I'm new to cooking and I'm new to bento-making. I spent roughly about 25 pesos for this bento. The total cost of this bento (if all ingredients were taken account for) would be 35-40 pesos. Depending on the quality of products that you would use. Take note that this cost is for 2 bentos already.

    Meatball Yakisoba with Stuffed Bell Pepper
    Meaty Mickey Bento


    Today's Bento Menu:
    • Pork Meatballs
    • Luncheon Meat
    • Cheese-stuffed Bell Pepper
    • Spicy Chicken Yakisoba
    I got the pork meatballs already flavored in SM Supermarket at 5 pesos per ball.  I placed 2 balls per bento.

    The luncheon meat is free, since it's today's breakfast. I used up 2 slices of Purefoods Luncheon Meat. 1 for each bento.

    I forgot where I got the idea of stuffing a bell-pepper with cheese, but that's what I did.
    Here's my recipe for it:
    • 1 medium sized bell pepper
    • 2 triangles Laughing Cow spreadable cheese
    • 1 pinch onion powder
    • 1 Tbsp grated cheddar cheese
    1. Core the bell pepper (it would be great if the bell pepper were small, so you could have 2 of this babies). Wash the insides of the bell pepper. Make sure there are no seeds left
    2. On a small bowl, mix together the cheese, onion powder and cheddar cheese
    3. Stuff the cheese mix inside the bell pepper using a spoon and a butter knife. Make sure that the whole pepper is stuffed
    4. Optional: Grill or sear the bell pepper.

    My Spicy Chicken Yakisoba is big downplay of any authentic yakisoba. I actually cheated a bit on this one. Since I don't know how to cook yakisoba, and I'm on a tight budget, I bought 2 packs of Nissin Spicy Chicken Instant Yakisoba. CHEATER! I know! I did however upped the game a bit by putting various vegetables in the yakisoba, and tried to make a sauce to flavor the veggies.
    Here's what I did:
    • 2 packs Nissin Spicy Chicken Yakisoba
    • 1 small carrot, diced
    • 4 pieces sweet peas
    • 3 pieces baby corn, chopped
    • 1/2 medium bell pepper, cubed
    • 1 small onion, diced
    • 1/8 cup Lee Kum Kee Premium Soy Sauce
    • 1 Tbsp Sugar
    • 1/8 cup water, room temp. or warm.
    1. Cook the yakisoba noodles according to the instructions indicated in the pack
    2. Heat oil in a pan on low. Put in the carrots and the baby corn. Saute until you see a minimal change in color. Add in the onions and the sweet peas. Saute until onion is becomes a little transparent
    3. Add the soy sauce and sugar into the pan. Simmer for a few seconds, add in the water. Saute the vegetables until everything is well coated. Simmer for a few minutes or until the sauce is reduced.
    4. Turn off the burner/remove pan from heat. Cut out the remaining sauce in the pan, leaving at least 1 tsp of sauce. Vegetables shouldn't be saucy since the yakisoba pack already has a sauce pouch with it it.
    5.  Mix the yakisoba sauce and podwer in the veggie-sauce you made. Do not use the dried up vegetables that came with the pack.
    6. Add the sauce to the noodles and mix to evenly distribute the sauce.
    My Bento Story:
    Since this bento wasn't what I wanted to make, I made the combinations haphazardly. I really have no idea how to put this together with the lack of ingredients. I wanted to add a few tamagoyaki but or even just a plain boiled egg, but I couldn't find an egg last night and this morning to save my life. I couldn't afford to buy by the carton, so I had to omit the egg. Also, you may have noticed that one bento doesn't have a stuffed bell pepper. That's due again to my budget constraints, I ran out of cheese.
    The taste of this bento was surprisingly good! For something that I thought out of whim (well, considering how much time I thought out the other bento menus). The veggie sauce I made complemented the yakisoba sauce well. The meat balls also blended well. Actually, if you eat the noodles where the meatballs sat, it tastes really good! Next time I'll dice the meatballs and include it with the veggie-yakisoba sauce. The Luncheon meat added a great salty taste to the sweet yakisoba flavor. All the meat used in this bento worked well with the sweet-spicy-salty taste of the yakisoba. I was surprised with how good the cheese-stuffed bell pepper tasted. It-was-freakin'-awesome!!! SDEHBF ate his bento with me, so I got to taste the cheese-stuffed bell pepper! The sweetness of the bell pepper worked well with the sour-salty taste of cheese stuffing! It was an explosion of flavor in my mouth! I think it will be doubly awesome if the cheese-stuffed bell pepper was grilled or seared for a few seconds. YUM!