Pages

Showing posts with label bento box. Show all posts

Thursday, August 30, 2012

Bento No. 9 Tuna on Wholewheat Rotini Pasta


This bento is easy to make, not to mention scrumptiously healthy! You can make this in under 30 minutes, and what's more, everything you need is in your cupboard!

Tuna on Wholewheat Rotini Pasta Recipe

Ingredients:

  • Half a box of Wholewheat Rotini Pasta (you may use other pasta, not necessarily wholewheat)
  • 2-3 cloves of garlic, pounded
  • A can of flaked tuna, drained
  • 1 small onion, diced
  • 2 tomatoes, diced

Procedure:

  1. Cook the pasta according to package instructions
  2. Oil a heated pan. You may use the oil in the canned tuna if you use the flakes in oil version. I used olive oil. Do take note that the oil will be the base of your pasta sauce, so make sure you use enough oil, and that the oil is a healthy oil. Once the oil is hot enough, saute garlic until lightly browned
  3. Add the tuna flakes. Sautee until the tuna is well heated
  4. Add in the onion and tomatoes. Sautee until well heated, and then simmer for a few minutes
  5. Mix the pasta sauce and pasta
  6. Pack in your bento box. Make sure that it is cooled before you refrigerate

    Tuesday, August 28, 2012

    Bento No. 7 - Cold Soba Noodles with Hardboiled Egg

    As I make more bentos, it seems that I want to try and make more Japanese themed ones. I wanted to experiment more on flavor and I dared to go where I wouldn't have gone if I were just the eat-loving person that I was a year ago.

    This bento is an experiment bento that I whipped up in under 20 minutes. Not really bad for a first time recipe!

    Today's Bento Menu

    • Cold Soba Noodles
    • Hardboiled Egg

    Cold Soba Noodles Recipe

    The Cold Soba Noodles were easy enough. It just needed a few ingredients and it's good to go.

    4 Tbsp Rice/White Wine

    1 Tsp Flavoring or 2 Tbsp dashi stock

    2 Tbsp Soy Sauce

    2 Tbsp Sugar

    2 Bundles Soba Noodles

    1. Cook the Soba according to package instructions
    2. While you're boiling the noodles, make the sauce by combining the rice/white wine, white sugar, flavor enhancer (could be dashi stock but I don't have any), and soy sauce. Mix them together until all the sugar is dissolved. It may help to heat it up in the microwave for a few seconds just help in dissolving the sugar. Don't heat it up too long or the alcohol will dissipate completely. Place it in a non-spill container that will fit in your lunch box. Remember to cool the sauce completely before packing
    3. When your Soba Noodles have finished cooking, drain the water and rinse it with cold running water (I used tap, since tap water is relatively cold compared to the boiling water). This is to remove any starch. Cold Soba Noodles, as I have read, should not have the starchiness that noodles have. Be careful though, these noodles are slippery!
    4. Arrange your Soba Noodles neatly in your lunch box. Garnish as desired. I used Nori Strips

    Hardboiled Eggs Recipe

    Do I even have to expound on how this is done? Haha.
    1. Put your eggs in a pot with enough water to submerge the eggs
    2. bring the water to a boil
    3. once water is boiling, let the egg boil for 5 to 10 minutes, depending on how hard you want your eggs
    4. drain the water and submerge the eggs in cool water
    5. carefully peal the shell, and cut in half, or cut in half and then peal the shell carefully

    Where to Buy the Ingredients

    Here's a list of where you can buy the ingredients I used in this recipe.
    Shallot Sauce
    Where it was bought: Carvajal, St. Binondo
    Alternative stores: None that I know of
    Lee Kum Kee Soy Sauce
    Where it was bought: South Super Market, Ligaya
    Alternative stores: Major Supermarkets
    Wang Soba Noodles
    Where it was bought: Robinsons Metro East Supermarket
    Alternative stores: Major Supermarkets with Asian section
    Sugar
    Can be bought anywhere
    Egg
    Can be bought anywhere
    Korean Vodka(?)
    I don't know. This was given to us. Probably in Korean stores

    Wednesday, August 8, 2012

    Bento No. 6 Yakisoba with Sho-yu Tamago and Vegan creamcheese Bell Pepper

    This bento is just a repeat of a previous bento, with just the addition of the Sho-Yu Tamago. This is actually the last bento I made for lunch as a technical consultant for my 2nd job. I didn't want to burn myself out on my last day of work so I made an easy bento. Plus, I really wanted to try that vegan cream cheese recipe that I've been reading about.


    Bento Menu:
    1. Nissin Instant Yakisoba
    2. Sho-Yu Tamago
    3. Vegetarian Creamcheese filled Bell Pepper (failed).
    4. Cut pieces of Nori


    The Yakisoba is easy enough, my recipe to kick the flavor up a notch can be found here.

    Sho-Yu Tamago or Soy Sauce is really easy to make. Took me about 3 minutes to give the egg that brown color. More or less 10 if you include boiling the egg and shelling it. It's best done the night before.

    I got the Sho-Yu Tamago idea from Just Bento, so head on over there to check out how it's made

    My Bento Story I wanted to make an easy bento with enough oomph to brighten up my last day. Though I quit the job and it was my choice to leave, saying goodbye is really tough. I'm not only saying goodbye to my friends, I was also saying goodbye to the happy and fun lunch breaks I get to spend with Kitty. I actually loved to color, and since it's a remake, I assumed everything would go without a hitch, not until I tried out my vegan cream cheese! It tasted weird! I guess I have to find a neat-o recipe for vegan cream cheese. Some of the veggies I used weren't really that fresh. Some even tasted funky.. eew! So overall, this bento didn't really do well for me, but not because it wasn't good. It's just that I made the wrong choice of ingredients.

    Bento No 5 - Chicken Pandan with Caramelized Eggplant

    This post is originally from my personal-anything-goes-blog, dated May 15, 2012
     

    Today's bento is especially scrumptous! I guess Ive broken my blah bento streak! It's also great news for me, cause I created a bento for bubu (my sister) as well.


    Today's Menu:
    • Plain, unsalted onigiri
    • Pandan Chicken
    • Caramelized eggplant
    Today's carb is just plain rice. I just molded the rice using the onigiri mold I bought last week. The brown sauce you see on the rice are the drippings of the caramelized onions

    The pandan chicken is again, bought from SM Supermarket. I have no idea how to cook it, but what I did was I fried it while still wrapped in pandan.

    The caramelized eggplant is a stroke of genius for me. Last night, I had no idea what to do with the eggplants. Before sleeping, I had a eureka moment. I told my self I'll make a rub for my eggplants. I dozed off as I was listing the ingredients for the rub in my head.

    Ingredients
    • 2 medium sized eggplants sliced
    • Sugar
    • Garlic powder/ground fresh garlic
    • Salt
    • Paprika
    • Turmeric
    Procedure:
    1. Mix all the dry/powder/flavor ingredients together according to your taste. I didn't measure my ingredients but the major component of the rub is sugar. Don't add too much turmeric cause it can discolor your skin
    2. Rub the flavor on the sliced eggplants. Coat both sides. Set aside for a few minutes. The eggplants will excrete water while letting the flavors set
    3. Water fry the eggplants - Using a non-stick pan, just fry the eggplants as you normally would with oil. The eggplants will naturally excrete water.

    My Bento Story:
    This bento has a fried leaf theme, or that is, the colors are those of burnt plants. I really wanted to make this bento savory because I was making it the first time for my sister and she loves eggplants! Needless to say, she and kitty loved my bento! It really is yummy!


    Tuesday, August 7, 2012

    Bento Day 4 - Playful Puppy Bento

    This post is originally from my personal-anything-goes-blog, dated May 15, 2012
     

    Today's bento took me about 7 minutes to make, 10 minutes tops. Quite a record actually. I wasn't able to get up early to make a bento. I also had no idea what to make for today's bento, so everything was out of whim and very simple, the concept just even popped out of my head. Not planned at all.

    Playful puppy bentobento day 4

    Today's Bento Menu:
    • Cheese Stuffed Onigiri
    • Century Tuna Octodogs (fail)
    • Various shabu shabu meats
    • Chopped Green Olive
    • Tamagoyaki

    My cheese stuffed onigiri is just actually plain rice with bits of cheese inside. Didn't have the time to sear the rice, let alone flavor it. I was so lacking in time.

    My proteins for today aren't really healthy, unless you consider the fact that the octodogs are made out of tuna hot dogs. The shabu shabu meats are left overs fro last night's shabu shabu dinner. They were already cut in half last night to minimize cooking time. I can't remember which is which for the shabu shabu meats, since we buy them by packs and they're already in assorted variants. Doesn't matter though. The surprise of flavor adds to the mystique of the bento. Usually, we fry these babies in our shabu shabu, but since I'm opting for a healthier lunch, I boiled everything. Didn't even bother using flavored water. It's just plain water. Straight from the faucet into the pot.

    My Tamagoyaki is about 5 days old already, just sitting in the freezer.  I got the recipe and procedure for my tamagoyaki from lunchinabox.net, I didn't have dashi stock, so I used the soup from 5 night ago's dinner, Tinolang Manok. It tastes great though!


    My Bento Story:
    Like I said, everything was on a whim today, including my Playful Puppy Concept. I so wanted to make a face in my bento today so I just chopped up an olive and placed it on my onigiri and then just tossed everything inside my bento. When I got in the office, I tried fixing up my bento and try making something out of my bento. At first I wanted it to be a horse, but in the end it looked more like a thin piglet, so I though, hey why not make it a puppy who wants to have its tummy scratched?

    Overall, I wasn't expecting a scrumptious lunch, and I was correct with that. Taste was really bland. Needed lots of ketchup. It would be great to have a ketchup and cheese onigiri though! I'll take a mental note of that.

    Friday, August 3, 2012

    Bento Day 3 - Pesto Torikatsu with Summer Cool Down Salad

    This post is originally from my personal-anything-goes-blog, dated May 14, 2012
     

    Day 3's bento was a bit bleak! I just pulled it together haphazardly. I had no idea what to match with my pesto torikatsu, and I didn't want to repeat any of my bento food items yet.

    I was excited to make this bento for one thing, I bought my first set of rice molds! Well, it's actually just one shape - a triangle, but I'm pretty glad I now have a mold for my bento :)

    Day 3's Menu, like I said, was put together haphazardly, but the blend of flavors were still considered. Actually taste-wise, my previous bentos were much more yummier. Only the salad in this bento had this oomph factor.


    Day 3's Bento Menu:
    • Plain Onigiri with Bell Pepper garnish
    • Pesto Torikatsu
    • Summer Cool Down Salad
    My plain Onigiri was just freshly cooked rice, then I added about 1-2 tbsp of apple cider vinegar to give it a little flavor. I then molded it in my newly bought onigiri molds. I let the rice set for a few minutes and then seared it in a pan with very little oil. After cooking one side for a few minutes, I flipped it then coated the seared side with Lee Kum Kee Soy Sauce (The green one, best for seafood). After a few minutes, I flipped the onigiri again. The side with the soy sauce is now being seared again. I coated the top side with soy sauce too and flipped the onigiri one last time before removing from the heat. I garnished it with a triangular-shaped bell pepper.

    My Pesto Torikatsu is again bought from SM Supermarket. I was surprised with the flavor of the torikatsu. I wasn't expecting it to have a distinct pesto flavor, but it did. I was really pleased with the flavor. It blended well with my summer cool down salad.

    The Summer Cooldown salad was actually just something out of whim. I had no idea what to do for veggies. I also wanted the veggies to have a great color to liven up my dull looking bento. I looked at our veggie crisper and saw that I still have a few left veggies like carrots, baby corn, sweet peas and bell peppers. I wasn't in the mood to saute them, nor did I have the time, so I thought I'll just use carrots which can be used immediately. I checked our fruit crisper and saw that we have several bags of mangoes, so I thought, "Hey! This could be an interesting salad!". I could almost taste the different levels of sweetness that the carrots and the mangoes would give out! How refreshing! I also added a dash of apple cider vinegar to prevent them from browning, and to blend the flavor of the salad with the bento. I called it Summer Cool Down Salad because the colors were so festive and bright like the summer, and yet it's so refreshing! It's best served cold.

    Ingredients:
    2 small carrots or 1 medium carrot, cold
    1 large mango, cold
    1 tsp-1 tbsp apple cider vinegar

    Procedure:
    1. Grate the carrots and mango
    2. Slowly add the apple cider vinegar
    3. Toss the salad
    4. Refrigerate if you won't use it yet. Will probably keep for 2 days
    Serves 4

    My Bento Story
    This so far isn't really good. Aside from the salad, everything else didn't give an oomph, nor looked very appetizing. I wasn't able to dress up my bento well, add the fact that I almost grated my thumb! It was a tough job to grate carrots and my finger won't stop bleeding!

    In placing the food in my bento, I wasn't really paying attention on how to put the food items in. I was just careful to separate the salad since mangoes are juicy and might juice around the box. Lacking proper bento paraphernalia, I just folded a soft-drinks plastic bag and placed the salad inside.

    The bento wasn't filling nor was it satisfying, but I guess it's better to have food than none at all

    Bento Day 2 - Pork Meatballs and Luncheon Meat on Spicy Chicken Yakisoba with Cheese-stuffed Green Bell Pepper

    This post is originally from my personal-anything-goes-blog, dated May 9, 2012
     

    Okay. So I had a hard time in planning out this bento, mainly because of budget constraints, and also because I had a different bento in mind yesterday afternoon, and I found out later that I lack most of the ingredients needed for the bento I wanted to make for today. I guess that bento'll be for another day.

    Anyway, my bento today took me, more or less, 45 minutes to make. It's a really long time to make a bento this simple, but hey, I'm new to cooking and I'm new to bento-making. I spent roughly about 25 pesos for this bento. The total cost of this bento (if all ingredients were taken account for) would be 35-40 pesos. Depending on the quality of products that you would use. Take note that this cost is for 2 bentos already.

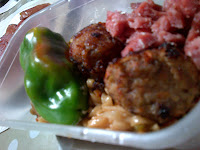
    Meatball Yakisoba with Stuffed Bell Pepper
    Meaty Mickey Bento


    Today's Bento Menu:
    • Pork Meatballs
    • Luncheon Meat
    • Cheese-stuffed Bell Pepper
    • Spicy Chicken Yakisoba
    I got the pork meatballs already flavored in SM Supermarket at 5 pesos per ball.  I placed 2 balls per bento.

    The luncheon meat is free, since it's today's breakfast. I used up 2 slices of Purefoods Luncheon Meat. 1 for each bento.

    I forgot where I got the idea of stuffing a bell-pepper with cheese, but that's what I did.
    Here's my recipe for it:
    • 1 medium sized bell pepper
    • 2 triangles Laughing Cow spreadable cheese
    • 1 pinch onion powder
    • 1 Tbsp grated cheddar cheese
    1. Core the bell pepper (it would be great if the bell pepper were small, so you could have 2 of this babies). Wash the insides of the bell pepper. Make sure there are no seeds left
    2. On a small bowl, mix together the cheese, onion powder and cheddar cheese
    3. Stuff the cheese mix inside the bell pepper using a spoon and a butter knife. Make sure that the whole pepper is stuffed
    4. Optional: Grill or sear the bell pepper.

    My Spicy Chicken Yakisoba is big downplay of any authentic yakisoba. I actually cheated a bit on this one. Since I don't know how to cook yakisoba, and I'm on a tight budget, I bought 2 packs of Nissin Spicy Chicken Instant Yakisoba. CHEATER! I know! I did however upped the game a bit by putting various vegetables in the yakisoba, and tried to make a sauce to flavor the veggies.
    Here's what I did:
    • 2 packs Nissin Spicy Chicken Yakisoba
    • 1 small carrot, diced
    • 4 pieces sweet peas
    • 3 pieces baby corn, chopped
    • 1/2 medium bell pepper, cubed
    • 1 small onion, diced
    • 1/8 cup Lee Kum Kee Premium Soy Sauce
    • 1 Tbsp Sugar
    • 1/8 cup water, room temp. or warm.
    1. Cook the yakisoba noodles according to the instructions indicated in the pack
    2. Heat oil in a pan on low. Put in the carrots and the baby corn. Saute until you see a minimal change in color. Add in the onions and the sweet peas. Saute until onion is becomes a little transparent
    3. Add the soy sauce and sugar into the pan. Simmer for a few seconds, add in the water. Saute the vegetables until everything is well coated. Simmer for a few minutes or until the sauce is reduced.
    4. Turn off the burner/remove pan from heat. Cut out the remaining sauce in the pan, leaving at least 1 tsp of sauce. Vegetables shouldn't be saucy since the yakisoba pack already has a sauce pouch with it it.
    5.  Mix the yakisoba sauce and podwer in the veggie-sauce you made. Do not use the dried up vegetables that came with the pack.
    6. Add the sauce to the noodles and mix to evenly distribute the sauce.
    My Bento Story:
    Since this bento wasn't what I wanted to make, I made the combinations haphazardly. I really have no idea how to put this together with the lack of ingredients. I wanted to add a few tamagoyaki but or even just a plain boiled egg, but I couldn't find an egg last night and this morning to save my life. I couldn't afford to buy by the carton, so I had to omit the egg. Also, you may have noticed that one bento doesn't have a stuffed bell pepper. That's due again to my budget constraints, I ran out of cheese.
    The taste of this bento was surprisingly good! For something that I thought out of whim (well, considering how much time I thought out the other bento menus). The veggie sauce I made complemented the yakisoba sauce well. The meat balls also blended well. Actually, if you eat the noodles where the meatballs sat, it tastes really good! Next time I'll dice the meatballs and include it with the veggie-yakisoba sauce. The Luncheon meat added a great salty taste to the sweet yakisoba flavor. All the meat used in this bento worked well with the sweet-spicy-salty taste of the yakisoba. I was surprised with how good the cheese-stuffed bell pepper tasted. It-was-freakin'-awesome!!! SDEHBF ate his bento with me, so I got to taste the cheese-stuffed bell pepper! The sweetness of the bell pepper worked well with the sour-salty taste of cheese stuffing! It was an explosion of flavor in my mouth! I think it will be doubly awesome if the cheese-stuffed bell pepper was grilled or seared for a few seconds. YUM!


    Thursday, August 2, 2012

    Bento Box Day 1 - Torikatsu Parmesan and Ketchup butter gohan with cheesy brocolli

    This post is originally from my personal-anything-goes-blog, dated May 8, 2012


    I was scheming all day yesterday about how to make my SDEHBF feel special on his birth month. I don't know about you, but I love getting the royal treatment on my birth month, and he sure did make me feel special last year. I want to return the favor this time around.

    Since he's so into anime and manga, I thought, why not make him a bento box? I was prowling the Internet for ideas on bento making.

    So here's my first ever attempt of a bento:

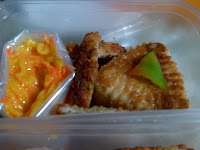
    Orange bento boxparmesan torikatsu bento
    parmesan torikatsu bento

    Today's Menu
    • Butter-Ketchup Gohan / Rice
    • Parmesan Torikatsu
    • Blanched Broccoli with cheese sauce
    • Vegetable saltine crackers for dividers
    • Strips of quickmelt cheese over the gohan


    I got the gohan/rice recipe from lunchinabox.net. It was supposed to be an onigiri or a fried rice ball but I had too much butter on my rice mixture that I wasn't able to form strong balls of rice.

    My Paremesan Torikatsu was bought from SM Supermarket, pre-made, so all I had to do was fry it. Talk about speedy bentos! I had a bad experience when I bought it though. There was a cockroach on the torikatsu I bought! SDEHBF saw it before it was packed away by the cashier. They "changed" our torikatsu though. Not sure if they just repacked it or if they really replaced my torikatsu. Horrible! horrible! I fried and re-fried the torikatsu just to be sure that the germs are dead. Eeeewww.

    The blanched broccoli were left overs from last night's dinner. Notice how it's mostly stalks! Haha! The cheese sauce was made by my wonderful mum. Yay!

    Bento Box Story
    Nothing much happening in this bento box. I think I did okay for my first bento. The colors looked wonderful, though mostly on the shade of orange.

    In this bento box, I just primarily wanted  a basic lunch accommodating the 3 major food groups - Go, grow, and glow! (yeah bit childish terms!).

    SDEHBF texted me at around 9am and told me that he was so excited to eat his bento that he ate it at 9am! He also said it was good! I found it deliciously sufficient.

    After making and eating this bento, I find myself in a frenzy about bentos. Can't wait to make one tomorrow (or maybe this evening!)